I have made 4 of these albums in the last couple of weeks.
They are super easy, and yet a tad confusing,
so hopefully these instructions will make it easy for you to recreate your own.
Note: you can order all of the paper by clicking here.
Step 1. Create the base pages, all in the same color of cardstock
cover 7x7 (2 pieces glued together)
Pg 1 A & B 7x3 (2 pieces with an envelope sandwiched in between)
Pg 2 A & B 7x3 (2 pieces with an envelope sandwiched in between)
Pg 3 A & B 7x3 (2 pieces with an envelope sandwiched in between)
Pg 4 A & B 7x3 (2 pieces with an envelope sandwiched in between)
back cover 7x7 (2 pieces glued together)
So your cutting guide would look this


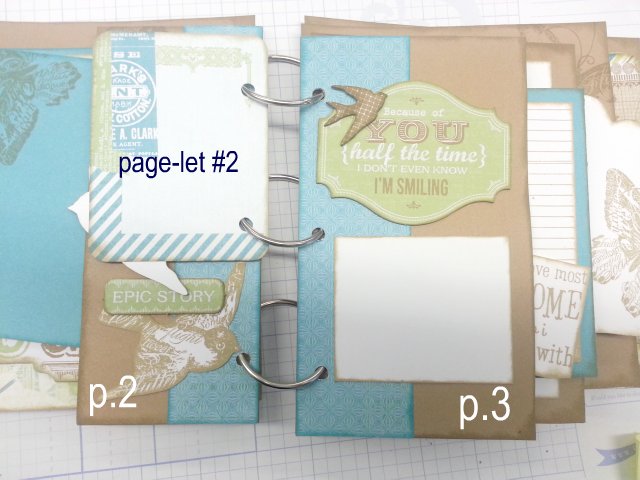
Step 2. Layout all your pages with the basic B&T paper added
See below for examples


Step 3. Glue you pages together as shown below


 However you could also use small flip flaps like I did in the album below
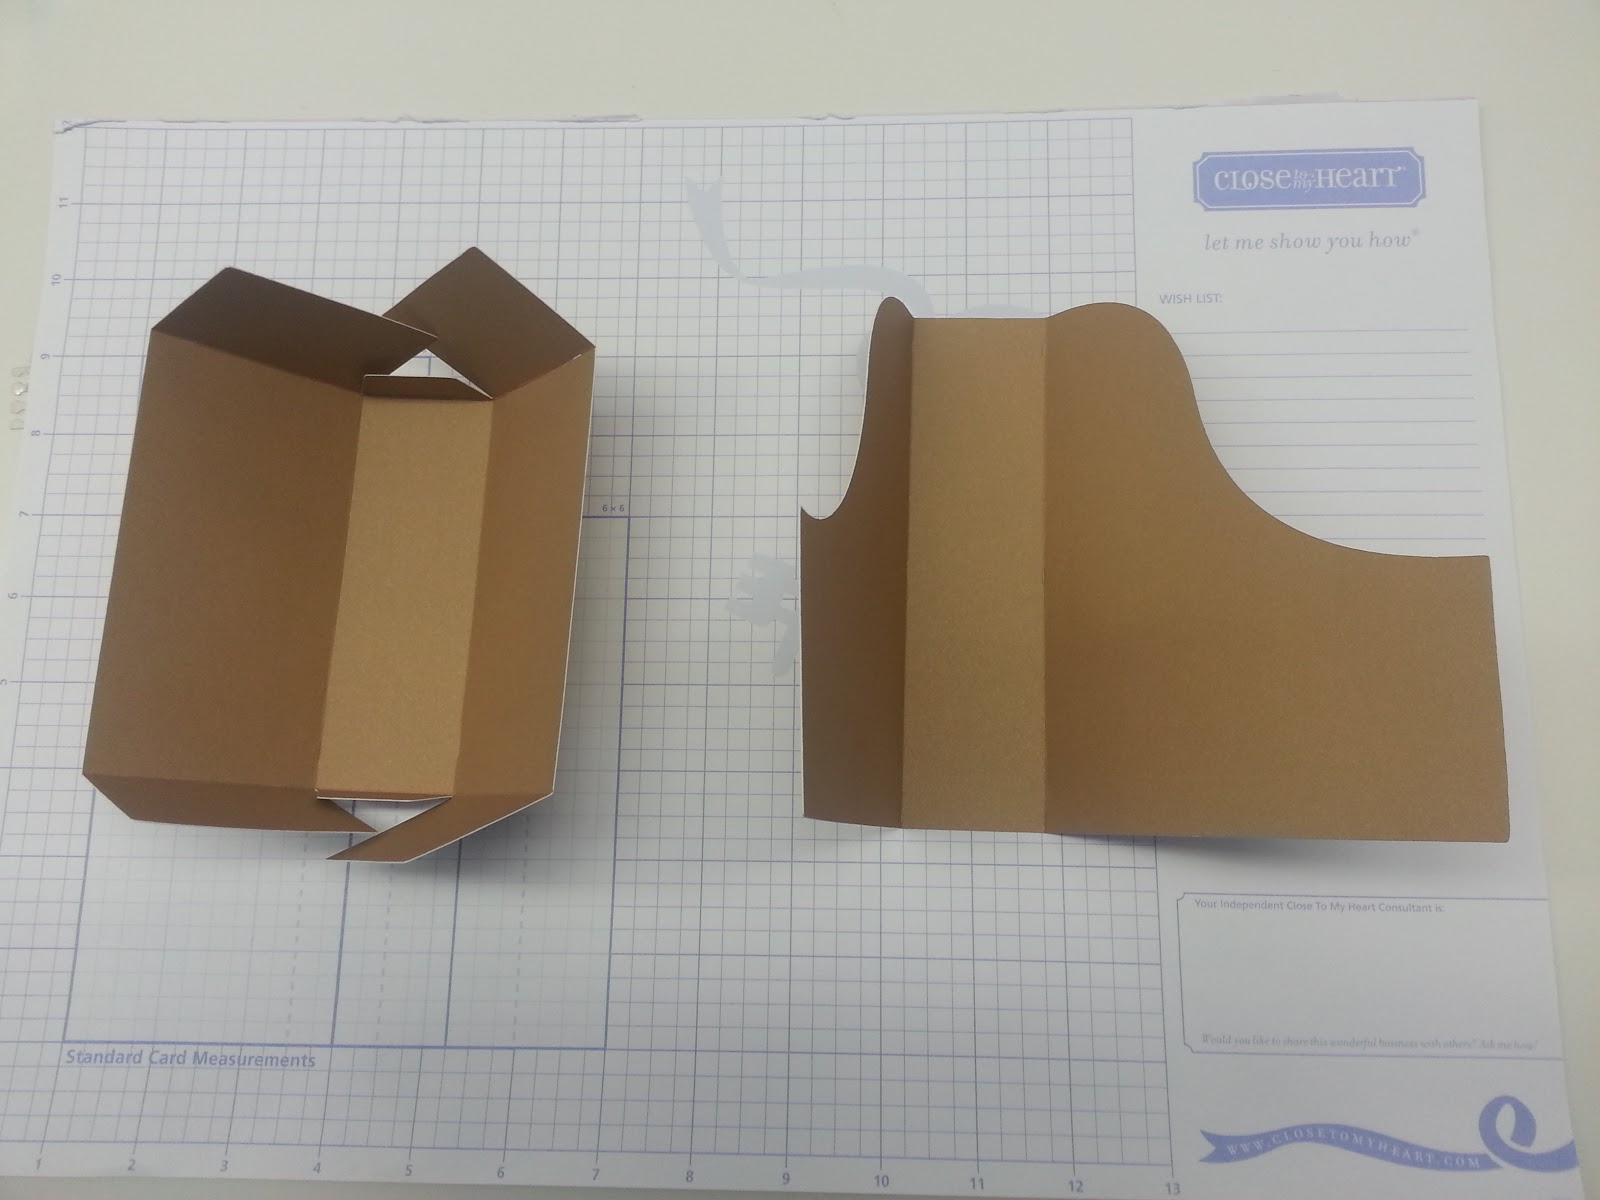
 Step. 4 Create the mini fold out album
Basically this is a 4 1/2" x 12" piece of cardstock in a contrasting color to your base page of your mini album. The pic below is from the Skylark mini.

Step 5. Add tags, and tags and tags,
where ever you have a pocket add a tag, or two tags
vary the size and type of tag. Add some stamping and distressing to your tags,
be creative. Below are two examples


Thanks for stopping by. Please leave a comment. I love to hear what you think.
They are super easy, and yet a tad confusing,
so hopefully these instructions will make it easy for you to recreate your own.
Note: you can order all of the paper by clicking here.
Step 1. Create the base pages, all in the same color of cardstock
cover 7x7 (2 pieces glued together)
Pg 1 A & B 7x3 (2 pieces with an envelope sandwiched in between)
Pg 2 A & B 7x3 (2 pieces with an envelope sandwiched in between)
Pg 3 A & B 7x3 (2 pieces with an envelope sandwiched in between)
Pg 4 A & B 7x3 (2 pieces with an envelope sandwiched in between)
back cover 7x7 (2 pieces glued together)
So your cutting guide would look this
Step 2. Layout all your pages with the basic B&T paper added
See below for examples
Step 3. Glue you pages together as shown below
Step 4. Add the Flip Up Mini Album to page 3A

Basically this is a 4 1/2" x 12" piece of cardstock in a contrasting color to your base page of your mini album. The pic below is from the Skylark mini.
where ever you have a pocket add a tag, or two tags
vary the size and type of tag. Add some stamping and distressing to your tags,
be creative. Below are two examples
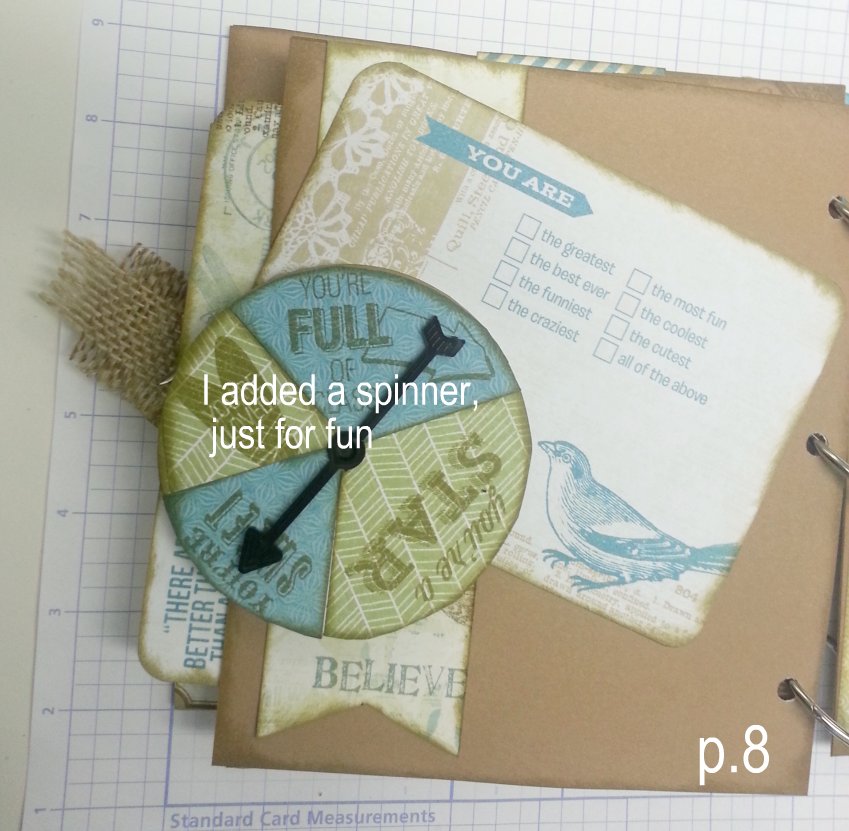
Step 6. Embellish, this is the fun part. Go through your album page, by page
adding a little bit here and there. I love Close to my Heart's my Complements for this
Below is a tag from the Skylark mini that I have embellished,
Step 7. Optional---create a mini page between each page.
I did this in the Skylark mini by simply using cards from the
NEW Picture My Life program or PML for short
Below is an example of how everything can come together
These are the basic intructions I used for the Timbeline mini , the Skylark mini (both of these are completed and on previous posts) and the for Balloon Ride & Lollydoodle mini that I am working on.
Thanks for stopping by. Please leave a comment. I love to hear what you think.