Monday, October 31, 2011

my creative space

So, I was bemoaning the fact that my kitchen is a disaster area,
And I haven't finished the reno yet.
And my garage became a dumping ground instead of my studio,
Which forced me into the house
Where I took over the kitchen
(who needs to eat or cook??)
Can you see where this is going...
So here is my kitchen turned creative studio mess

From October 31, 2011

Then on the weekend my daughter asked me if we would "EVER" have a normal house.  You know, the kind where they eat at the table

From October 31, 2011

And the toaster is not used as a shelf for your paper cutter

From October 31, 2011


So, I unplugged my cricut
rolled up my sleeves and headed to my garage
And now this is where I am working

From October 31, 2011


From October 31, 2011


From October 31, 2011


From October 31, 2011


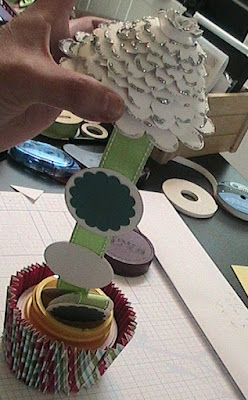
Okay the job took longer than it should have,
 because I had to stop and make a cupcake.

AP 31 3D cupcake album

If you're going to make a cupcake, you probably need some baking soda (or at least the container)

From October 30, 2011


From October 30, 2011

In hindsight I would have put the foam tape up over the ridged area,
I used one layer of foam tape at the bottom and two at the top.
This gave your cupcake some "flair"


From October 30, 2011


to make the cupcake holder I borrowed Tresa Black's idea, and refined it to work for me.
I cut 3  12" x 2 1/2" strips, scored every 1/4 inch (for the first inch or so) and then folded the strips back and forth.  You don't have to score the whole strip. It just makes it easier to make the folds even.


From October 30, 2011


Glue the three pieces together to form a circle.


From October 30, 2011


turn the baking powder tin upside down and press accordian folded circle into foam tape.
You can then run a bead of hot glue or liquid glass arround the bottom the secure it better


From October 30, 2011


This is what it will look like from the top

Time to make the frosting
cut  about 12 flower #5 from your AP cartridge
  I made one at 2,  2-1/4, 2-1/2",  2-3/4,and so on until I reached 3 1/2
and then rolled the edges over a pen to curl them down.


From October 30, 2011

Then I started layering them like so
I used a double layer of foam tape between each layer

From October 30, 2011


From October 30, 2011

I then cut one more flower at 4 1/2 inches (I made it so it would sit over the edges of the cupcake)


From October 30, 2011


I then cut a flower (font on page 70) to put on top


From October 30, 2011

Time to Glitz it up

From October 30, 2011


AND NOW FOR THE ALBUM

From October 30, 2011

I cut these circles at 2" so they would fit inside the baking powder tin (try one, before youcut a bunch)
make as many circles as you want in your album.
Leave about 3/4 between circles so the album will fold down into the container nicely


From October 30, 2011

On the end that will be glued down inside the container I left about 3inches between it and the first "photo" circle (this is so you can see your first photo) and on between the last two circles I left about an inch and a half.  I then glued the last circle to the bottom of the "frosting"

Then all you have to do is lift the frosting....

From October 30, 2011


From October 30, 2011


From October 30, 2011


From October 30, 2011


From October 30, 2011

And when it's closed

I would like to thank Mary Crosby for starting me on this creative journey and Tresa Black for her inspiration.  I hope you like this.

p.s. in hindsight, I think an empty Pringles container would work as well.
and I may take the next day off.


Sunday, October 30, 2011

All over the world

I always find it interesting to view my "Stats" and see where the people that are viewing my site live.  Interesting enough, even though I am a Canadian, I have more viewers from the United States.  
I  had a couple from Brazil  the Philippines, and Germany this week.
So, I wonder where in the world will I be next??

just a hint--

You will want to see what I am showcasing tommorrow....This is the last day of the cricut shape-a-day challenge.  And although this month has been fun...I have put most everything else on the back burner (this could be a hint)
In fact my daughter asked me when we were going to get our kitchen back to normal
So I cooked (another hint) something up.  Inspired by Tresa Black, movitated by Mary Crosby.
See you tommorrow

Saturday, October 29, 2011

AP 30 time to clean up my workspace

I have been busy creating all month.
  In fact, I was up at 6 am this morning to make and post that little believe album & box.
  And I used the cricut for multiple images,
so I am going to skip my post tommorrow
and instead post picture of my cleaned and organized work space.
Till tommorrow.

AP29 mini box & album--Believe paper


From October 29, 2011


From October 29, 2011


When you fold the box in (on the inside score lines you will then know how big the inside of your box will be.  This box is 4".  So I know I can make my album 4 x4)


From October 29, 2011


From October 29, 2011


From October 29, 2011


Each of these borders is 4 inches in length


From October 29, 2011


I used trees for my center page, you can use anything you like


From October 29, 2011


Album  with two end pages closed

From October 29, 2011


When you open the end pages there is room for a greeting or photo


From October 29, 2011


.
From October 29, 2011

Close your album to find the back, then adhere ribbon as shown

From October 29, 2011


From October 29, 2011


From October 29, 2011

Album in box

From October 29, 2011

I cut the "seasons greetings" at 2 1/2 (shape #12, p 38) matt cut at 2 3/4
I then adhered the image to one flap (this just made it easier for the box to stay tied shut.

From October 29, 2011


supplies used
X7145B     Believe paper pack
X5900       white daisy cardstock
Z1383        sweet leaf ribbon
Z1364        brads
Z1081        waxy flax (wrapped around brads to keep outside pages closed)
                  this is one of my favorite products, so easy to tie and work with
                  ...I love it and have all the colors
October SOTM
D1380 Just for the Holiday (retired)
Note:  You can use any stamp set that you like these are just the ones I used


to purchase your supplies click here


Friday, October 28, 2011

AP 28

Another "postage stamp" mat. 

From recipe album wonderland

AP 27-flower

Just a little flower, an accent that is quick and easy to make..sponge the edges and voila..

From October 11, 2011

Wednesday, October 26, 2011

AP 26 snowflake

One of the nice things about Close to my Heart's cricut cartridge
 is that it co-ordinates with so many of our stamps.  Like these little  snowflakes.

From winter pillow boxes oct1 2011


Tuesday, October 25, 2011

AP 25

So, this is what I came up with
...a mini album/card for my daughter's birthday...


From gift box/card dreamin


Okay, I can hear your wheels turning
...this looks just like the box,
but bear with me.

This is what it will look like when you open the box


From gift box/card dreamin


And this is the album opened


From gift box/card dreamin


And when it is opened up more

From gift box/card dreamin


I think she will like it.

We are nearing the end of October, and my crazy idea to post an Art Philophy cricut inspired project every day.  It's been a little stressful at times (trying to meet the daily deadline and work and have some time with my daughter).  However, I have really enjoyed it.  And I plan to keep posting regularily, but maybe not every single day. 
Thanks to everyone who has taken the time to view my projects and comment on them.  I love hearing from you.
Terry Ann Diack


Monday, October 24, 2011

AP 24 gift/card box


From gift box/card dreamin


Today's Cricut image is just a little box, cut at 9"
 out of one of my favorite "Close to my Heart's" winter paper packs...Dreamin'

Below is an image of the details of the cut.

From gift box/card dreamin


Add a little adhesive and ...voila, you have a box ready to fill


From gift box/card dreamin


But what to fill this little box with???
Hmmm.
I have an idea....I'll show you tommorrow what I come up with.